|
12/29/2020 0 Comments QuickBooks Multi User Mode Not Working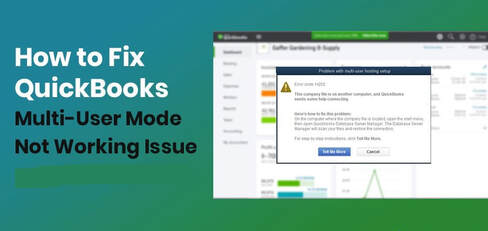 How to Fix QuickBooks Multi User Mode Not Working Issue? QuickBooks multi user mode is an inbuilt feature in QuickBooks that enables multiple users be effective on a single company file on top of that. This particular aspect helps in increasing collaboration and enhances productivity. Each user must have the QuickBooks license to use the multi-user mode in QuickBooks. The problem with QuickBooks desktop multiple users mode arises once the user is wanting to launch the company file which was situated on another PC. In this instance, you may not get any error nonetheless it will automatically display QuickBooks Multi user mode not working on another computer. If Your QuickBooks Multi User Mode Not Working and you need help then Contact our Proadvisors. Reasons for QuickBooks Multi User Mode not working:- There might be a quantity of reasons that will result in the appearance of multi-user mode QuickBooks – QuickBooks is not installed regarding the server. The hosting settings are not properly configured. Firewall or antivirus software is not allowing communication between user computers. The database server struggles to open the QuickBooks company file. Windows file permissions are not properly set. Answers to Fix QuickBooks multi-user mode no longer working issue You could face QuickBooks multi-user mode no longer working problem once you have completed QuickBooks multi-user setup for making use of QuickBooks in multi-user mode. This dilemma is associated with errors such as H101, H202, H303, and H505. Following solutions makes it possible to in fixing this problem: Use QuickBooks File Doctor Download the QuickBooks File Doctor tool through the Intuit website and run it. This tool analyzes whether your pc is properly put up for making use of multi-user mode or not. After running the tool, check whether you are facing QuickBooks multi-user mode not working problem. Use QuickBooks Database Server Manager Open QB Database Server Manager in your server computer by typing the database into the Start menu. If you find no folder locations, use Browse to visit the folder storing company file/files. Strike the OK button and then click the Scan button. By using the above mentioned steps, firewall permissions are certain to get repaired. Now, check whether QuickBooks multi-user mode no longer working problem has resolved. Check to host mode for each of this user computers On a person computer, open QuickBooks File menu and then Utilities. If Host Multi-User Access appears regarding the list, relocate to the following computer since this means this computer just isn't hosting company file. If in the event, Stop Hosting Multi-User Access appears on the list, select it to disable hosting and enable QuickBooks single user mode. Once you've ensured that hosting mode is off on all user computers, search for the QuickBooks multi-user mode not working error. Check whether QuickBooks services are running To make use of QuickBooks in multi-user mode, QuickBooks services–QuickbooksDBXX (XX represents the year of QuickBooks) and QBCFMonitorService- must certanly be in running state in the server computer. In the Windows search bar, type services.msc and hit Enter. See if QuickBooksDBXX service appears into the Services window. If it is not appearing, follow these steps – If you only make use of Database Server Manager, then make sure that it is installed from the server. For every year of QuickBooks Desktop installed in the workstation, there must be installed the corresponding Database Server Manager. If in case, the entire program is run using the pc, ensure hosting is enabled regarding the server. Double-click QuickBooksDBXX service. Under Startup type in the screen, the value should be Automatic. Service started should show Running or Start. Under the Recovery tab, you have to elect to restart the QuickBooksDBXX service when it comes to first, second and subsequent failures. Repeat the above-mentioned steps 1 to 4 for the QBCFMonitorService. Now, open QuickBooks in multi-user mode for each of this user computers to see if QuickBooks multi-user mode not working issue is solved or perhaps not. If the issue is still occurring, check membership of QuickBooksDBXX service. It should be part of the administrator group. Also, it should have all the necessary permissions. Make certain QuickBooks can send data This solution has two steps – Change settings of firewall or antivirus software If the firewall is the reason behind QB multi-user mode not working issue, you have to manually set up exceptions in the firewall for ports that QuickBooks software uses for transmitting data. If antivirus application is resulting in the error, configure it to resolve the problem. Perform file path testing to check on if QuickBooks can keep in touch with the server Because of this, Network Discovery ought to be turned on therefore the name associated with the server should be known. Follow these steps – Enter ping [servername] when you look at the Run command and strike the Enter button. Make use of the Universal Naming Convention (UNC) path through the user computer to go to the shared folder into the server. To visit the QuickBooks company file, make use of the UNC path. Create an innovative new company file folder This solution requires the development of a new folder for the company file on the hosting computer. Set up folder and Windows access permissions when it comes to new folder to ensure company files could be shared. Copy the .qbw file into the new folder and check whether you're in a position to open the company file in multi-user mode.QuickBooks multi user mode not working problem may have been resolved. The solutions given above should resolve QuickBooks multi user mode no longer working issue. But, if you're unable to apply some of these solutions or if the situation will not get fixed, you can easily give us a call at our QuickBooks Desktop Support Phone Number to obtain expert technical assistance.
0 Comments
12/28/2020 0 Comments QuickBooks Enterprise Database Setup Install, Update, and Setup the QuickBooks Database Server Manager
QuickBooks is a well-known and largely preferred accounting & bookkeeping solution. With this software, the users can quickly carry out their day-to-day business operations on regular interval of times. Being a QuickBooks user, you might be well conscious of QuickBooks database server manager, or have to have found out about it one or more times. Many QB users find it hard to put in, update, and set up QuickBooks database server manager. Thus, keeping all those facts in your head, we now have come up with this specific article, where I will be learning simple tips to configure the QuickBooks Database Server Manager to allow multi-user access. Not only this, but this information will brief you about installing, updating, and setting inside the database server manager. To satisfy the QuickBooks Desktop demands, it is important to along with recommended to setup this tool. This QBDSM tool should be installed through the system where in fact the QuickBooks Desktop company files have now been stored. Thus, looking over this informative article will help you learn exactly about QuickBooks database server manager. However, for expert guidance an individual could make a call at our toll-free number easily put., and speak about the matter with your support team. Our team is having a long time of expertise and expertise in handling a variety of QB related issues. You could also read: Simple suggestions to Fix QuickBooks Rebuild Not Responding Error? Brief into QuickBooks database server manager QuickBooks Database server manager is an effective tool given by Intuit. This tool enables the consumer to arrange applications for multiple users. Database server manager installation is vital, as without this, it isn't easy for the user to work with multiple version of QuickBooks desktop. Moreover, QuickBooks database server manager enables the buyer in order to make optimal usage QuickBooks desktop software and likewise helps the users to create network data file (.ND) for virtually any company file through the host computer. In this article, we shall brief you with regards to the procedure to configure QuickBooks Enterprise Database Setup (QBDSM) in multi-user mode. quickbooks database server manager - screenshot Facts associated with QuickBooks database server manager A number of facts pertaining to QuickBooks database server manager, below we now have listed those dreaded: QuickBooks Database Server Manager is responsible for generating Network Data documents (*.nd) for each provider files saved regarding the server computer. If the user is making usage of a number of versions of QuickBooks Desktop, then in that case the consumer needs to put in each type of the Database Server Manager. Installing multiple versions of Database Server Manager can also give you the user with multiple variations of processes. Many users confuse it with multiple versions of software, which is not right. This tool gives the user with multiple variations of processes in place of multiple versions concerning the software. In case user is making utilization of multiple versions of QuickBooks Desktop, then setting-up the Database Server Manager for every and every version in chronological order (from oldest to latest) is really important. Another fact associated with QuickBooks database server manager is that the loading the Database Server Manager guarantee that the year’s database service is actually running in the background. Within the Windows Services interface (accessible through the Windows Control Panel), these types of services are listed as QuickBooksDBXX, where XX represents the version number (ex. “29” is truly for QuickBooks Desktop 2019 and “28” for QuickBooks 2018). Lastly, the QB Database Server Manager installed for every QuickBooks variant adds an individual (ex. QBDataServiceUser28 for 2018 and QBDataServiceUser27 for 2017). Find out how a person can install, update and setup the QuickBooks database server manager with the aid of following Infographic: Install, Update, and set up the QuickBooks Database Server Manager - Infographic Read also: Configure QuickBooks firewall for multi-user mode How exactly to Install QuickBooks database server manager? Now you know about various information about QuickBooks database server manager, it is the right time to unleash the technique to set up it. You will find a list of steps tangled up in this technique, that I should be exploring 1 by 1. Let us take a glance: Step 1: To begin with, the customer has got to double-click the installer to your QuickBooks and then start the “Installation Setup Wizard”. Step 2: After that pick the “Next” option, in case system is on the internet and equipped to download an upgrade. Otherwise, find the “No” icon, then strike the “Next” tab. Step three: And then, shutdown the active application, accompanied by hitting onto the “Next” icon. Step 4: from then on, an individual is intended to learn the relation to the “Software License Agreement“. In the foreseeable future, select “I accept the terms when you look at the license agreement“, followed closely by selecting the “Next” tab. Step 5: a person is then necessary to pick the “Custom or Network Options” icon. Step 6: after which it, tap through the setup type: Select the ‘I’ll be utilizing QuickBooks with this particular computer AND I will be saving’… in the event that you will run the QuickBooks program about it computer system. Discover the ‘I won't be using QuickBooks using this computer’… if you’ll just store QuickBooks informative data on this computer. Notice: If a person opts for “I won’t be using QuickBooks using this computer…” then, in that case they want to not ever ever enter a license number. Step 7: Now choose the “Yes” icon, and then click allow access. Step 8: go fully into the ‘License Number and Product Number’ (the text at the end of this window tells you locations to try to find this). Step 9: adhere to the on-screen instructions to do the installation. Step 10: Setup the Database Server Manager after it is often installed. Step 11: it is in addition crucial to Set your firewall permissions. Step 12: Finally Update Database Server Manager How exactly to Update the QuickBooks Database Server Manager (QBDSM)? Updating the QuickBooks database server manager may be required to due to certain reasons. It must be noted that, when a forward thinking new type of QuickBooks desktop is installed from the workstations or once the update to each year is released, then in that case it is mandatory for a person to update QuickBooks database server manager. The steps mixed up in means of updating database server manager are down the page: Step one: in the first place, the customer needs to download the patch from “Update QuickBooks Desktop to your release“. Notice: The patch in terms of host is the same as the patch with regards to workstation. Next step: after which, Reboot the host following the patch setup completes. (it really is strongly recommended). Step three: the next matter into the act is that once the server happens to be updated, in connection with workstations, a person will have the following message stating: “The company file has to be updated to accomplish business with this specific form of QuickBooks Desktop“ Step four: Moving ahead, an individual would get a prompt to “Create a backup” which can be required because these updates can modify the database structure. Step 5: the very last and final part of the process is to followed the prompt message and finish the backup process, and from then on an individual should be able to open the business file when you stick to the prompt messages after finished the backup. Read Also: Simple suggestions to Fix QuickBooks update errors? Simple tips to Set-up and work out use regarding the QuickBooks Database Server Manager (QBDSM)? In the same way the upgradation process, there are particular steps to be followed to utilize, along side to set-up QuickBooks database server manager. If you're unacquainted with this particular procedure, then proceed with the steps the following: Step 1: to start with, open “QuickBooks database server manager” and then scan the files which to utilize use when it comes to multi-user access. Scan and Add Folder Feature - QuickBooks Database Server Manager - Screenshot Second step: The next step into the act would be to scan the “Company files” on the server, so that you can make certain that the files are configured properly to provide them with utilization of the multiple users. This task might include further sub-steps: An individual might be needed seriously to go to the Start button, accompanied by clicking on All Programs option, as well as on QuickBooks folder. Moving ahead, the consumer could need to tap on Scan folders. The next thing is to scan folders and verify the folders which contain the QuickBooks company files. In the event, a person is unacquainted with the file location, then he/she can select to Scan the entire disks. Also, the buyer needs to have the Scan button/Start Scan and start utilising the scanning process. Scan Company File in QuickBooks Database Server Manager - Screenshot Once most of the folders are scanned, an added users will be able to open company files remotely. Step three: Now so that you can “Add new company files” in to the server, the consumer could make utilization of “Monitored drivers feature” and continue maintaining the database server manager up to now. Proceed to the commencement button, and then go through the Programs option. There after, click on QuickBooks as well as on QuickBooks database server manager. If the user wants all of the local drives to own monitored in terms of company file, especially the ones that are added, removed, or renamed, in that case your user is needed to click the select option. quickbooks database server manager - Screenshot 1 Step 4: The user has to be sure that the business files are attached to the server plus the users are logged in to the company files. Step 5: in case the consumer wishes to alter the “Status for this service “then implement the “Service administrator tool” and configure the service. Step 6: the final step up this method is to try using the “Updates features” tab and then download the recent updates to your QuickBooks server. quickbooks database server manager - updates features Using this, the customer needs to hit Start button, followed by simply clicking this system option. Once finished with this, the consumer is likely to be anticipated to click on QuickBooks and likewise on QB database manager. Coming to the second step, go for updates. After which, install updates by using the instructions. QuickBooks Desktop 2020 currently uses dynamic ports! They are specific port numbers (not a variety) assigned during installation to ensure QuickBooks Desktop uses a given port entirely. You’ll get these numbers in QuickBooks Database Server Manager. QuickBooks database server manager tool can: Scan the folders and QuickBooks company files. It is an essential aspect for multi-user access. This tool examines your local storage devices to detect a fresh company file on it's own. Check this out also: Simple tips to delete a deposit fund in QuickBooks? Steps to Configure the QuickBooks Database Server Manager The user can configure the database server manager, in the event he/she does not need to make use of the default settings. The steps to be followed are: The initial step should be to open the windows start menu And then, type in services option to the search bar and then open it After that, look for and open QuickBooksDBXX (XX could be the version number) Followed by navigating to the general tab and after that choosing the service status section. Just in case it truly is started or are running, then select stop The next phase is to pick the automatic option through the startup type drop down menu And then logon tab, and choose a nearby system account option Moving ahead, the user has to navigate to your recovery tab and then choose the restart the service option out of each and every one of these drop down menus: First failure, Second failure, and Subsequent failures QuickBooksQBXX Recovery Tab option - Screenshot. Days gone by step would be to go back to the conventional tab and then choose begin to restart the database server manager Winding up..! In summary this article, we would recommend the QuickBooks users to follow the steps stated earlier to set up, update, put up, and use QuickBooks database server manager. In the event, a person is facing any issue from the database server manager – an individual may freely contact the QuickBooks enterprise support experts at their toll-free helpline number. Our team of QB experts and certified professionals can help the users to deal with nearly every issue connected with QuickBooks. 12/27/2020 0 Comments Delete A Company In QuickBooks POS How to Delete an organization in QuickBooks POS QuickBooks POS is a wonderful software that can help in completing work even faster and in a far more streamlined way. In fact, QuickBooks can be understood by a layman too while working on the software. It will be the numero uno software when you look at the accounting domain in today’s times. Every data stored within QuickBooks POS is safe and secure but sometimes there is certainly a necessity to delete the said data. Though it is easy to feed in however if you don’t know how to delete a company in QuickBooks POS then read on. QuickBooks is the next amount of easing out payments and cash flow for every user. It is ideal for every company of any domain. Information is completely secure with a software like QuickBooks POS. QuickBooks POS is a single stop solution that helps with following inventory and sales of small business houses meticulously. Whether it is about analyzing the budget, monthly payroll, bonus calculations, etc, QuickBooks can really help the user in just about every way. Usually while focusing on QuickBooks, users may have questions and queries regarding what to do in a few circumstances. One particular question that arises is simple tips to Delete A Company In QuickBooks POS. Let us explore a tad bit more about it to know the steps in depth. Steps on how best to Delete an organization in QuickBooks POS: Follow these steps for the deleting process: Incase you may need help at any point of time then along with your QuickBooks POS then dial. There are situations where in actuality the user is replacing the system for a faster alternative. However, there might be situations where in actuality the user might need to delete information prior to taking the device away. Before initiating the procedure, a duplicate of information should be there for future reference. Save it for removable media or other system. POS can store data in varied locations in line with the form of Windows. In case of or windows 7, files are available in C:Documents and SettingsAll UsersDocumentsIntuitQuickBooks Point of Sale x.x (x.x would be your POS version). Windows 7 or Vista, files are located in C:UsersPublicDocumentsIntuitQuickBooks Point of Sale x.x. The sub folder name are going to be Data and an alternate folder with it because of the company file name. Remove the complete folder named QuickBooks Point of Sale. This will delete all the company data files. Backups will also be deleted through the default location. In the event that backup is outside of the system, if so, look for files named as “.qbp””. They are QuickBooks Point of Sale backup files. In case, search shows the outcomes, delete them. After deleting, check out the recycle bin. Empty it completely. Now all important data for the organization associated with POS data files and their backup have already been deleted through the system completely. Reach us: Dial tollfree at for instant help for QuickBooks. If the user struggles to comprehend the above steps, it is better to make contact with experts at AskForAccounting so that they can explain in a detailed way what should be done. They will certainly assist the user in completing the procedure in a way that no important data gets deleted or even the system just isn't harmed in anyway. AskForAccounting QuickBooks tech support team is always there for the user. Ask for QuickBooks customer care team which includes highly trained officials who is able to show you at each step on the best way to delete an organization in QuickBooks POS. They've been available at any hour for many users. The team is tremendously trained and knowledgeable as they are coping with QuickBooks POS related issues for many years now. Thus wait no more to get help via our phone or chat with us online. 12/23/2020 0 Comments Record A Journal Entry In QuickBooks Simple tips to Record Journal Entries in QuickBooks Accounting transactions could possibly get entered incorrectly into an accounting system, or perhaps a transaction needs to have been split into two different general ledger accounts, for instance. Either way, when this happens you have to make modifications to your original transaction after it has been recorded, and you will do that easily in QuickBooks accounting software by making a journal entry. You could make journal entries in QuickBooks to modify or correct transactions and post entries that cannot be performed various other ways, such as for instance adjustments to profit or loss. The journal entry process is fairly straightforward, you could only make a journal entry for one customer or vendor at the same time. If you'd like to correct multiple customer or vendor balances in this way, you'll have to post separate entries. If you want to know about How To Record A Journal Entry In QuickBooks then Contact our Proadvisors. What Is a Journal Entry? A general journal entry is an accounting transaction this is certainly entered, or posted, right to the general ledger. A business's general ledger will act as its main number of accounts used to record balance sheet and income statement transactions. For example, you might have entered the monthly $100 domestic bill into your company's insurance expense account by accident. You can easily post an adjusting journal entry to reduce, or credit the insurance coverage expense account by $100 and increase, or debit the utility expense account by $100 to fix your mistake. All your accounts would then be in proper order, and you also would not need certainly to replace the amount owed by the vendor because that percentage of the transaction was recorded properly. Journal Entries for Year-End Activities Your certified public accountant or bookkeeper might want to make journal entries to perform year-end activities, such as for instance posting tax adjustments to your books, recording depreciation expense or reclassifying revenues and expenses. Your accounting professional can provide you with specific information if you want to post the journal entries yourself at year's end, along side explanations for why the entries were needed for your unique situation. Steps to make General Journal Entries in QuickBooks You are able to general journal entries in QuickBooks by following these step-by-step instructions: Head to Company > Make General Journal Entries from the menu at the top of the screen. Replace the Date field, if necessary, into the Make General Journal Entries window. QuickBooks will default to your current date if you like to post an entry for a previous month or year, make sure to change it out which means that your entry gets recorded into the proper financial period of time. Enter a number for the journal entry when you look at the Entry No. field. QuickBooks will automatically number subsequent journal entries sequentially. Go into the general ledger account number In the Account column. You may find the first account from a drop-down menu when you look at the Account column. Enter the debit or credit amount for the account you've selected into the Debit or Credit columns. The debits and credits should be corresponding to result in the entry balanced and allow QuickBooks to create the entry. Enter a descriptive memo in the Memo Column. It'll be displayed on reports that include this journal entry. This task is optional, nonetheless it's recommended to make sure you'll remember later why the entry was made. Repeat Steps 4 through 6 through to the entries completely offset one another in addition to transaction reaches a zero balance. Your total when you look at the Debit column should equal the full total in the Credit column, as well as the journal entry will likely then be properly balanced. Click Save & Close to save the journal entry and close the window, or click Save & New to save lots of the journal entry and open an innovative new window. You could make most general journal entries in QuickBooks using these steps, however if you want to make journal entries that affect a particular customer’s account receivable or a vendor’s accounts payable, you'll have to put the customer or vendor on the first line of the entry. 12/22/2020 0 Comments Reports In QuickBooks 6 Steps to Building the Reports You Need in QuickBooks If you're a professional QuickBooks® Desktop (Pro, Premier, Accountant or Enterprise) reports customizer, you understand how great QuickBooks is actually for building custom reports regarding the fly. However, there are many really important restrictions to learn about, including what I think is most prevailing: QuickBooks is only able to build a written report using data from 2 kinds of tables. The 2 tables include: Transactions: they are the fields/data points that live inside each transaction, such as Invoices, Bills and Checks. Names: These are the tables that store Customer, Vendor, Item and username and passwords. So, the issue is that you cannot pull up a written report, such as for example “Sales by Preferred Vendor,” using QuickBooks custom reporting functions. That’s because Preferred Vendor is a data field that lives within the Item List table and Sales is likely to be area of the Transactions Table (such as invoices and sales receipts). Therefore, you would need to pull two different reports and then use some type of VLOOKUP formula to place it together … I know some people Excel gurus have probably figured out how to try this. However, it is not a sustainable process as it will probably require the usage of a consultant every time the report needs to be built. If you have QuickBooks Enterprise 14 and above, along with a dynamic annual subscription, you can make use of the brand new Advanced Reporting add-on called QBAR (included with your subscription) to create this report. If You want to know about Reports In QuickBooks then call our experts. You can find a number of videos when you look at the QuickBooks Enterprise Learning Center on QBAR. I interviewed Joseph Lasee, senior product manager for QBAR, asking him just how to create a report similar to this step by step, and to shed some light into how this in contrast to QuickBooks’ standard reporting capabilities. Watch the video here, or click the box below. To sum up, the ultimate way to build the report is to follow these six steps: 1. Go to your Reports menu and click on Advanced Reporting to run QBAR. You truly must be in multi-user mode and possess user permissions to operate QBAR if you should be not the Admin. 2. Open a Starter Report, such as for instance Sales by Item Detail. It should appear to be this: 3. Right-click on the light gray bar on top of the “chart” (in QBAR, any table with data, whether or not it’s graphical or not, is named a Chart), and then click on properties. 4. First, we are going to ADD the preferred vendor from the Item table by clicking on the Dimensions Tab. It should look like this: The next step listed here is to consider the Item table within the drop-down, where it says Show Fields from Table. Then, into the Available Fields/Groups above, look for Item.Preferred.Vendor.Full.Name and click on Add. When you see it in the Used Dimensions box, click on it and promote it all the best way to the utmost effective. This means that this is the key row (or pivoting row) that may organize the data – this is basically the “By Preferred Vendor” percentage of the report that people are building. It must look like this now: Optionally, it is possible to click on Suppress When Value is Null if you do not want to see any numbers for items that do not have a preferred vendor. 5. Next, in the Expression tab, we intend to click on each expression and uncheck the Enable checkbox to the right, except for Amount. We can not disable amount because we require at least one expression of transaction data to demonstrate regarding the report (needless to say, you are welcome to keep QTY and SALES PRICE enabled, as they could also be beneficial in this kind of report.). Which should seem like this: 6. And, the final setting is Presentation. We intend to tell QBAR that individuals do not want to see any detailed transaction information – just collapsed totals. To do that, we need to choose the second dimension Item Type and uncheck Always Show Fully Expanded. It's going to appear to be this: Whenever we are done, we are able to click on Apply and OK, therefore the report will look such as this: You may have to right click on the title and click on properties to alter the title towards the desired name, similar to this: This might be just one exemplory case of the truly amazing potential that QBAR has for building those very specific reports your clients may need to make faster and better decisions. You will find currently a small number of learning resources on QBAR, but I have dedicated a typical page to my site to aggregating all the resources I know on Advanced Reporting for QuickBooks Enterprise. I am going to also keep updating the page as more and more resources become available! Now, although i will be writing this article, i am going to confess that I'm not a specialist in this tool at all. I had to expend a few hours to get familiar with it and my interview with Joseph was very helpful. So, I managed to get my goal this year in order to become increasingly more confortable using this tool in order for i could add a complete new dimension (no pun intended) of service to my current clients and potential new ones. The truth that this is not a straightforward tool to get going with, and therefore there isn’t a whole lot of consultants which have mastered this tool, presents an excellent chance for QuickBooks ProAdvisors!® Even though learning curve is long and there are many hours of trail-and-error experimentation before you build the comfort level to head out and offer Advanced Reporting customization services, I guarantee the rewards will undoubtedly be worth it.  QuickBooks Payroll Not Calculating Taxes QuickBooks accounting software is often used by business persons to calculate the federal income tax and federal withholding. Calculating the taxes through QuickBooks helps in saving time and steering clear of the tedious tasks. But, sometimes the difficulty occurs when QuickBooks payroll not calculating federal withholding or the QuickBooks software calculates the wrong taxes. To eliminate such problems and to provide you an error-free experience, we now have covered the causes and their useful fixes. By using most of the steps, you will resolve QuickBooks Payroll Not Calculating Taxes the matter on your own. Let’s begin with the reason why first. Grounds for QuickBooks payroll not calculating federal withholding There could be many reasons for QuickBooks payroll not able to calculate the federal withholding. A number of the causes are given as under: The employee’s annual salary is exceeding the utmost salary limit. Another reason is simply too low gross wages in the employee’s last payroll. You have got not updated the tax table as per the latest slab. The employee could have requested the tax exemption. The QB software not calculating the federal withholding can also happen as a result of incorrect payroll setup. Sometimes, an outdated QuickBooks payroll also leads to the federal withholding calculation error. Lastly, you have not updated the QuickBooks software according to the latest version creating trouble in running this program. How to fix QB payroll not calculating the federal withholding problem? Here are the best possible fixes to solve the QB not calculating the federal withholding error. Method 1: Check the Employee Profile to review the Federal settings The QB payroll software calculates the federal withholding by considering a couple of factors taxable wages, several dependents, pay frequency, and filing status. Stick to the steps below to check the profile. Open the QuickBooks software on your personal computer. Now click the Employee Pick the option Employee Center. Further, it is important to double-click in the employee’s name that is facing the difficulty. Click on PayrollInfo. Next, you'll want to check that you've got entered the appropriate details in Pay Frequency. Now choose the Taxes Click throughout the Federal Now verify the information under Filing Status and Allowance. Make sure the details are correct. Click Ok and close all windows. Method 2: verify that a member of staff has requested an exemption from federal withholding Firstly, you ought to open the QuickBooks Now choose the Employee Click over the Employee’s (One employee at once) Go through the Edit (Displayed with pencil or pen symbol) Now verify whether usually do not Withhold status is selected. Method 3: Correctly Setup the Payroll Taxes Open the Intuit QB software. Click on the menu icon regarding the top-left corner. Now choose the Taxes In the next window, click Payroll Tax. Next, you will see the Payroll Tax Setup and Compliance Here you need to verify the employee date of birth, hiring date, and W4 form details. To check on the federal withholding details, it is possible to go through the W4 form. Further, it is important to go into the Business Name (Same as while filing the tax). Now enter the Business Address. By clicking on the checkbox for just like Business Address will automatically pick up the address that you have used during payroll setup. Else, you can easily enter the details manually as well. Go into the Hiring Date of Employee within the last 6 months: Choose the option YES or NO. Go into the date to start the QuickBooks online payroll: you are able to select the choice to start the payroll before, on, or after the current month or year. Now you want to fill out the Federal Tax details and ID and in case you do not have it, then click No. You need to submit an application for the federal employer identification number (FEIN) if you do not have it. Fill the Payroll Tax Form by selecting either Form 941(quarterly filing) or Form 944 (annual filing). Look at the Federal tax payment option by selecting the frequency. Choose a non-profit business status as yes or no. Method 4: Update the Payroll tax table An outdated payroll tax slab will miscalculate the federal withholding. Follow the steps below to stay as much as date using the latest tax table. Also, you need to update the tax table each time you pay a salary to your workers. Online tax table update Login to your QuickBooks account. Click on the Employees Now you have to click Get Payroll Updates. Click the checkbox for Download Entire Update. Lastly, you ought to choose the Download Latest Update Wait until the download completes. Update the tax table via CD Open the QB Intuit account. Insert the Payroll updated CD to your PC or laptop. Click one the Employee Now select the option Get Payroll Updates. Click on the option Install Update fromDisk. Again click Install and wait for the process to accomplish. Method 5: Revert the Paycheck after updating the Tax Table This process will refresh the info and recalculate the taxes. Firstly, you'll want to open the Employee’s PayrollInformation in QB software. Not right-click over the Employee’s Pick the option Revert Paycheck. Method 6: Update the QuickBooks to the Latest Version Manual Update Make sure to save all QuickBooks company files. Close the QuickBooks software. Now click on the Start Seek out the QuickBooks Right-click over the icon and select to perform as Administrator. Now click over the Help tab and choose Update QuickBooks desktop. Click Options, choose Mark All. Click Save. Now head over into the Update Now menu and choose the option Reset Update. Into the end, select the Get Updates Automatic update In the QuickBooks application, click on the Help Choose Update QuickBooks Desktop. Head up to the Update Now Click Get Updates and begin the downloading process. Speak to Payroll experts to fix Federal Withholding issues These six steps are highly helpful to resolve the problems in federal withholding. If the issue is affecting an individual employee or it’s happening with multiple employees, you can fix the problem by using the steps as mentioned above. You can even speak to the QuickBooks Help if you cannot understand any point or could not have the desired results. Our experts can help you with a few advanced troubleshooting and fixes. 12/20/2020 0 Comments QuickBooks Gmail Not Working QuickBooks Gmail Not Working: Solved As all Quickbooks users understand that, how important the QuickBooks mailing service is. For this reason key feature of QuickBooks, scores of QuickBooks users can sync their email (Gmail, Outlook, webmail &, etc.) into QuickBooks easily, and can share their files to clients safely. But imagine that, in the case if, you ought to send a significant file to your clients or perhaps the accountant throughout your integrated Gmail account, and suddenly you found ‘QuickBooks Gmail not working’ then, just what will you do? Why don't we tell you that, it is just an imagination but, if this problem is occurring in your actual life, and you are clearly not able to use Gmail in QuickBooks then, don’t worry here we the solutions for you. Yes, in this website it is possible to boost your knowledge through the solutions and troubleshoot the problem QuickBooks Gmail Not Working in QuickBooks accounting software. Reasons & Solutions for ‘QuickBooks Gmail Not Working’ Here within the below, we have the reasons and solutions in line with the situations with this problem. have patience, and read and proceed with the steps carefully. Why QuickBooks Gmail Not Working Sometimes once we desire to use our Google account from QuickBooks, we encountered a mistake ‘Stopped on a sign-in attempt from Gmail’ message. Here we now have some reasons listed in the below, take a glance: Perhaps you have not entered the best user ID and password, which will be integrated with all the QuickBooks. Maybe you are asked for the check in confirmation but, you failed to. Maybe your body will not permit you to sync because of the QuickBooks to Gmail. The e-mail linkings are not correct in QuickBooks. The app may well not meet the modern security standards by QuickBooks. Because of the damage of MAP132.dll file. What are the techniques to Fix QuickBooks Gmail Not Working Problem Here when you look at the below, we now have provided different answers to solve the issue in accordance with the situations. You must choose the best solution according to your position and be rid with this solution. Solution 1: if your Email ID or Password is Incorrect Sometimes QuickBooks gmail not working because of the incorrect email ID and password. At that moment, you can view a panel of ‘Incorrect email and password’, in this example you must stick to the below steps: Re-enter your password and ID, still, if you should be unable to login to the Gmail, as well as the error message comes out then click on the ‘Cancel’ option. After that, try using the ‘Send forms choices’ to check on the Gmail account setting. Then click on the ‘Edit Settings’ option. Now do a little alterations in the port, and work out the SSL/TLS settings. You can easily click the ‘Default Reset’ option if you don’t would you like to change anything. Solution 2: If QuickBooks Freezes While Sending a message If you are struggling to send a contact throughout your synced Gmail account, and the QuickBooks froze then, stick to the given steps: To start with, you ought to install QuickBooks install diagnostic tool if you not installed it yet. Store the file on a nearby drive following the complete downloading process of this tool. After that, run the downloaded tool, and restart the system. It could take a while to download, so remain calm. Solution 3: When QuickBooks unable to Send Emails In the first step, you have got to certain that, QuickBooks is certainly not running as an administrator, if you are running the QuickBooks as an administrator then, uncheck it. Go with the QuickBooks, and then click on the ‘Properties’ option. Now uncheck the ‘Run the program as Administrator’. After that click on the ‘Ok’ button, and restart the QuickBooks. Now make sure the e-mail likings are correct in QuickBooks. To begin with, go directly to the ‘Edit’ and click on the ‘Preference’ choice to choose the ‘Send Forms’ option. Now when you look at the ‘My preference’ tab select that you would like to utilize to send emails then click on the ‘Ok’ option. In the event that preferences are correct then, stick to the sequence: Edit> Preferences> Send Forms>My Preferences> QuickBooks Emails>Ok > Edit > Preferences Select Outlook, and then click in the ‘Ok’ option. Choose QuickBooks, along with other programs, restart Windows, after which QuickBooks. Mail the transactions or reports. Solution 4: Error Message while Sending Invoices through Email Actually, this problem is certainly not for Gmail user, it will probably helpful for those whoa re the consumer of Yahoo email. Visit for the update to latest page, and then click on the ‘Change’ link to choose the QuickBooks product. Now click on the ‘Update’ option to update the files. Choose the ‘Setup Automatic Update’ for the automatic download. Still if you are facing the exact same problem then, aim for the next solution. Solution 5: Permit The Third-party Apps Open any browser in your body like Internet Explorer, Google Chrome, Firefox, etc. Head to gmail.com and then sign in to your along with your Gmail ID and password. Now go directly to the My Account section and then select Connected apps & sites. Through the Apps attached to your bank account section, locate Intuit QuickBooks. As opposed to Intuit QuickBooks, you will need to add QuickBooks Online to connect the QuickBooks software with Gmail. Hence ignore this. Switch on Allow Third-party apps Get back to the Gmail in QuickBooks and attempt to send an invoice by attaching it in your mail. Turn off the 2-step verification so you don’t need certainly to verify your account every time you log into your Google account from QuickBooks. The above-given steps should help you in resolving the QuickBooks Gmail not working issue. However, this dilemma can certainly be resolved by permitting a fresh device or app to gain access to your Gmail account. Conclusion We hope, these above solutions will help you to mend the problem ‘QuickBooks Gmail Not working’. We tried our better to provide all possible approaches to this problem. Just proceed with the steps carefully, and eliminate the problem. Further, if in case, you need any help to perform these steps, or have any doubts regarding this web site then, you may get our ProAdvisor support whenever you want and anywhere through the toll-free number for the instant help. 12/18/2020 0 Comments QuickBooks Error 6144-304 What exactly is QuickBooks Error 6144-304 QuickBooks Error Code 6144-304 is continuously showing up on your pc screen as long as you're using QuickBooks? Like to comprehend the sources of it, and would like to repair it soon? In this essay, you're getting most of the necessary data this is certainly needed regarding QuickBooks Error 6144-304. Among the other ways to get over any QuickBooks tech issue is by reaching off to our QuickBooks tech helpdesk people. Our QuickBooks tech team isn't only amply trained while using the QuickBooks related methodologies but has good experience and expertise to resolve QuickBooks Error 6144-304 the problems too. Now, let’s arrive at the main cause associated with QuickBooks problem. QuickBooks Error 6144,304 is simply from the company file which includes all of the accounting information. The situation starts turning up when something amiss is really because for the company file. A plenty of incidents will be the reason for this error, plus some them have now been listed here: In cases where the device closes automatically as the info is stored with it. This is certainly essentially the biggest reason which leads to the corruption. Also, one of the most prevent and common reasons of not just this, but other errors could be the attack of any virus or a malicious programs. The other top reason might be any security Software this is certainly wanting to hinder the performance. Resolutions Let’s talk about the possible solutions to resolve this QuickBooks tech error: Firstly, you will have to sign in with all the current admin privileges into the admin account. After signing in, you would need to open within the QuickBooks File Doctor with admin authorizations. Now, just watch out for QB to open up as it may take the time. Choose the browser and then click concerning the company file. Choose whether or otherwise not the existing company file is hosted using the pc or simply the server. Choose the correct option for the query which will pop up: are you currently on a computer or on a workstation. Next, you're going to have to scan for every difficulty with the file or the network glitches, which is completed with assistance from the QB File doctor. You'll be almost done, now just shut down the QuickBooks file doctor. Open up QuickBooks, to discover if you should be acquiring the problem. Most of the times this QuickBooks Error is very easily resolved using the steps mentioned previously. In the event you get stuck anywhere or are confused about some of the steps then please call our QuickBooks technical helpline, the quantity. Here, you can further talk about the tech issue with this specific QuickBooks helpdesk. 12/17/2020 0 Comments QuickBooks Error Code 5503 How to Troubleshoot QuickBooks Error 5503? Know very well what is QuickBooks Error 5503 and the way in which to fix it: The error selection of QuickBooks Error 5503 is that ‘Sync is most definitely not completed properly’. Unfortunately, a user deals with their QB accounting software and certainly will even encounter error code 5503, this message receives on users desktop – QuickBooks data is really uploaded, but wouldn't normally connect through the server. In this website context, we want to share some simplest troubleshooting QuickBooks Error Code 5503 steps that may resolved. What can cause Error Code 5503 in QuickBooks? QuickBooks Error 5503 Causes due to many and varied reasons as described here: Error Code 5503 causes as a result of matter this is certainly grasp through on-line services. The data was presented with by QB Company file that has been uploaded with a success. A small business file augmentation has been changed, so QuickBooks is actually not happy to peruse which a company has recorded. Error 5503 outcomes of the difficulty grasp on-line services. Or it will require place when the third-party in the developer application connections to your QuickBooks. The info and knowledge in your QuickBooks company file was uploaded with success. However, a slip occurred whereas downloading the changes produced by applications’ mistreatment grasp online services. Read Also: Simple Tips To Fix QuickBooks Error Code 15218? Simple suggestions to Fix QuickBooks Error 5503? As discussed below, here we have given a listing of QuickBooks Error 5503 solutions. Browse the following solutions as mentioned here: Solution 1: Create a brand name new folder and after that it Copy the organization file Firstly you need to “Create” and open a “New folder” and copy the business file towards the created folder. Now “Rename” it & then try to change its extension as “QBM” and save the file. You should open your QuickBooks software and restore your almost all of the portable files. Rename the “Extension” of the file in the event that file won't be opening. Restore your entire valuable backups. In the event file still not opened, utilizing the extension “.QBX“, then “Rename” it. Try to install the newest version launch of a “Sync Manager“. Solution 2: Rename the QuickBooks .nd File Open the folder name at where a person has stored the company file. Once you consider the data folder, give a one look into “.nd file” (For eg: “MyCompanyFileName.qbw“.) Give one right click in to the “.nd file” & then click on “Rename“. You will have to write “.OLD” extension at the conclusion of this file name to “Rename” it. From then on attempt to “Rescan” your file by making use of using QuickBooks Database Server Manager. If somebody will open the business enterprise file on the network, then this task does make an application for that only. Now try and perform this task on that server: Press the “Window” key, on your own keyboard. Click onto the “QuickBooks database server manager” option. This displays to start to look at folder window. Click about any of it to incorporate the folder. Select the file or a folder, where the user has stored the company file. Hit a click on “OK” key button. Now click on “Scan” option. Once the scan process completes, re-open your business file and test that once. See Also: Simple suggestions to fix QuickBooks Condense Data Errors (80004005, 80004003)? The final outcome After applying these troubleshooting steps we really hope you might able to fix this QuickBooks Error 5503 by the own. In the event that error still exists there along with the sync manager will not be functioning properly, usually do not worry our company is always there for you yourself to fix your entire QB related concerns. For just about any help, it is an easy task to take advice and assistance directly by our certified QuickBooks ProAdvisors team. Ask expert guidance proffered by our diligence expertise through online. Our company will be here now to fix your hindrances and clear your complete doubts in only a few momemts. Thus, connect us at QuickBooks Error support number from where expertise are highly trained & have a very good work expertise in deploying countable hurdles as 24/7. 12/17/2020 0 Comments QuickBooks POS Error 3180 How to Resolve QuickBooks POS Error 3180?
While utilizing QuickBooks, there was a possibility of coming across QuickBooks POS Error 3180. The problem of fixing this error is exactly what this informative article will focus on. QuickBooks is the leading accounting software these days. Why is QuickBooks POS Error 3180 showing up from the screen? QuickBooks POS Error 3180 can occur because of various reasons. It could occur when QuickBooks Desktop sales tax item is certainly not related to any vendor. It may happen if the account mapping of sales tax payable account is incorrect. Another cause may be the use of the sale tax payable account to create a paid out. It is also due to more than one items on receipts getting the sales tax payable account selected once the target account. As an element of this QuickBooks POS Error 3180 you will observe an email saying “Status Code 3180” appearing onscreen and interfering using the functioning of your programs. You will need to resolve this error at the earliest opportunity to maintain the smooth functioning of QuickBooks. Steps to Fix QuickBooks POS Error 3180 They are various solutions you can follow to resolve QuickBooks POS Error 3180. 1. Merge items in QuickBooks Open QuickBooks Desktop. Head to List. Go directly to the Item Choose to include inactive. To sort the list, select the Type header. Rename the purpose of Sale payment items. Right-click the payment item that starts with Point of Sale. Choose Edit Items. Add OLD to the item name. Choose OK. Run the financial exchange from your Point of Sale. In QuickBooks Desktop, merge the duplicate items. Right-click the payment method with OLD. Choose Edit Item. Remove OLD. Select OK. To ensure, choose Yes. Also Read: How to Resolve QuickBooks Error Code 80029c4a? 2. Make sure you assign the seller to the sales tax item Open QuickBooks Desktop. Go to List. Go directly to the Item Choose Include Inactive. To sort the list alphabetically, find the Type column. Be sure all sales tax item have a tax agency attached with it. 3. Choose your tax preference Open QuickBooks Point of Sale. Go to File. Choose Preferences. Select Company. Click Accounts under Financial. Tick the Basic and Advanced tabs. Make QuickBooks Sales Tax Payable is just listed in the sales tax row. Change it and run financial exchange if it is not. 4. Ensure you have got not given out the problem receipt using sales tax payable Open QuickBooks Point of Sale. Select Sales History. Right-click any column. Choose Customize Columns. Make sure to find the QuickBooks Status. Try to find receipts that are not completed yet. Choose the receipt if any of the receipts are paid out to sales tax payable. Click Reverse Receipt. Recreate the paid out using a non-sales tax payable account. Run financial exchange. They are the various steps to eliminate QuickBooks POS Error 3180. If they are too difficult to comprehend or follow, there is no need to worry. If the error is just too difficult to resolve manually, there's no necessity to panic. Dial QuickBooks Error Customer Support Number to get tech assistance of QB experts. |
AuthorWrite something about yourself. No need to be fancy, just an overview. Archives
November 2020
Categories |
 RSS Feed
