 Firewall Configuration for QuickBooks Point of Sale A firewall is network security device or security software which is specially built to obligate the unauthorized access in relation to certain sets of the rule. Irrespective of the firewall location, whether it’s present regarding the server or computer, it can easily capable to block/stop the communication amongst the QuickBooks Point of Sale company data & computer. The purpose of Sale utility is comprised of the capability to automatically detect & configures the firewall if it finds that the connections are blocked. Although, there are many time as soon as the firewall needed to configure manually because of the users. In this article, we will discuss regarding how a QB user can Configure Firewall For QuickBooks Point Of Sale by their own. While going through manual configuration, the users should read the manual given by the firewall program. So that they can perform the configuration accurately. Processes that is Interrupted by the Blocking of QuickBooks POS Listed here are few programs which will be interrupted when the security program blocks the QuickBooks Point of Sale utility: Electronic Funds Transfer: Processing regarding the Intuit’s Merchant Bank Card Database Server Manager: Capability to connect & record transactions/changes to the company file Intuit Entitlement Service: Product license & user validation More often than not Point of Sale automatically configure the firewall for you whenever the connectivity gets blocked. However, few-times you'll want to configure your firewall manually. If you are going to configure your firewall application manually, you need to review the correct chapters of the manual who has supplied with the firewall program. Steps to Configure Manually Windows firewall for QuickBooks Point of Sale? Points to Remember: Firstly, you need to have the authority on ‘Windows Administrator‘ rights to do. Ensure to incorporate the mandatory ‘Firewall ports‘ & ‘Executable files‘ for the idea of Sale utility (In case, the firewall security is a third-party program). It is recommended to get hold of the developer of this 3rd party program to know – How to add port & file exemptions. Manual Steps to Configure the Windows Firewall To begin with, You will need to Press ‘Windows+R‘ keys, the ‘Run‘ command will open. After that, Type ‘Control‘ & hit the ‘OK‘. The ‘Control Panel‘ will appear. On the right upper corner of the display, set the “View by” to Small Icons. Now Pick The ‘Windows Firewall‘. After that Choose the ‘Advanced Settings‘. Select the ‘Inbound‘ option there. Now Click on the ‘New Rule‘. Select the ‘Port‘, and then Hit the ‘Next‘. Type the variety of the ports, and then hit the ‘Next‘. Choose ‘Allow Connection‘, and then select the ‘Next‘ option. Give a specific name to your firewall rule, and then finally press the ‘Finish‘ button. See Also: Resolve QuickBooks error code 12031 Point of Sale Firewall ports, files and location These are the necessary ports for Point of Sale firewall configuration Port Port Numbers TCP(Incoming) 8040, 8443, 443, 2638, 46203, 46216 – 46220, 46225, 46228, 8024, 8025, 8035, 8036 UDP(Outgoing) 2638, 8024, 8035, 8036 Executable Files, Processes and Paths Begin to see the table below for a list of ports and which program files access them. Default Port Program File When Accessed 443 EFTSvr.exe Throughout operationMerchant Service transactions 8443 EFTSvr.exe Throughout operationMerchant Service transactions 2638 DataImporter.exeEFTSvr.exe QBDBMgr.exe QBDBMgrN.exe QBPOSDBServiceEx.exe Conversion from previous versionChanging currently running database. Startup Detecting switch to QBDatabases.ini Help > Manage my license Throughout operation 46203,46204 EFTSvr.exeQBDBMgrN.exe QBPOS.exe Throughout operationChanging currently running database 8024, 8025 QBPOS.exeSetup.exe Web installationLicense verification Throughout operation File Locations Note: In the following paths, XX may be the highest number version you notice. Windows 10, 8, and 7 (64-bit): File Location Eftsvr.exe (versions 9.0 and lower) C:\Program Files (x86)\Intuit\QuickBooks POS XX\ DataImporter.exe C:\Program Files (x86)\Intuit\QuickBooks POS XX\ QBPOS.exe C:\Program Files (x86)\Intuit\QuickBooks POS XX\ QBPOSShell.exe (versions 10.0 and higher) C:\Program Files (x86)\Intuit\QuickBooks POS XX\ QBDBMgr.exe C:\Program Files (x86)\Intuit\QuickBooks POS XX\DatabaseServer\ QBDBMgrN.exe C:\Program Files (x86)\Intuit\QuickBooks POS XX\DatabaseServer\ QBPOSDBService.exe C:\Program Files (x86)\Intuit\QuickBooks POS XX\DatabaseServer\ Windows 10, 8, and 7 (32-bit): File Location Eftsvr.exe (versions 9.0 and lower) C:\Program Files\Intuit\QuickBooks POS XX\ DataImporter.exe C:\Program Files\Intuit\QuickBooks POS XX\ QBPOS.exe C:\Program Files\Intuit\QuickBooks POS XX\ QBPOSShell.exe (versions 10.0 and higher) C:\Program Files\Intuit\QuickBooks POS XX\ QBDBMgr.exe C:\Program Files (x86)\Intuit\QuickBooks POS XX\DatabaseServer\ QBDBMgrN.exe C:\Program Files (x86)\Intuit\QuickBooks POS XX\DatabaseServer\ QBPOSDBService.exe C:\Program Files (x86)\Intuit\QuickBooks POS XX\DatabaseServer\ Important Note: While manually configuring the firewall of this device for QuickBooks. You will see questions with several options like deny, grant, block, permit, or something similar option. You must select most of the positive options like permit, allow, or grant the permission. The action is completed for one question or for a particular file or folder wont be automatically placed on all the files or folder into the POS program. Read Also: Solutions of QuickBooks Point of Sale Unexpected Errors Perhaps, it may be possible that your client still encounters the problem with configuring the firewall in QuickBOoks point of sale or other issue linked to QB. Well, you don’t have to be worry…!! Pro Accountant Advisor is a firm and dedicated team of certified Intuit accounting experts to solve all the issues, no matter whether it really is associated with firewall configuration, QB errors, QB Installation, or anything. It's also possible to directly call us . Into the meanwhile, when you yourself have still questions then feel free to contact us at our QuickBooks support number anytime.
0 Comments
12/16/2020 0 Comments QuickBooks Payroll 941 Report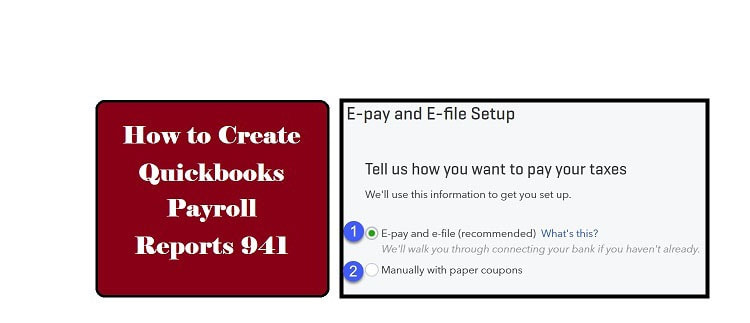 QuickBooks Payroll 941 Report The details illustrated below helps to create and print payroll report of form 941. Form 941 is actually utilized by employers to authenticate information about the withheld tax through the paycheck of this employees related to their income, medicare and social security taxes along with percentage of social security and medicare tax paid because of the employer QuickBooks 941 Feature The steps to build and print the Form 941 are same for other payroll forms like Employer’s Quarterly Federal Tax Return, Schedule B, Form 940, FUTA (Employer’s Annual Federal Unemployment Tax Return) and Employer’s Record of Federal Tax Liability. In many cases user face FUTA report error during submitting 940 . It really is expected that with these steps it will be possible to prepare and generate payroll reports for Forms 940 and 941 along with Schedule B of Form 941 if needed. Furthermore, the assumption is you are employing a dynamic subscription of QuickBooks Desktop Enhanced and Standard Payroll as well. QuickBooks Payroll Efile 941 For E-Filling 941 form via QB payroll user need to follow a specific process. First user has to obtain registered for IRS e-file program with their Employer Identification Number (EIN), name, job title, email address, and contact number and electronic signature Check official e-File Options | Internal Revenue Service – IRS. give full details. In QuickBooks user have to navigate through Employees > Payroll Center & need to find a listing of all Federal form and then have to choose Filing Method E-file and then click finish. Now user can Efile 941 via QuickBooks for more help, you must connect QuickBooks Payroll Customer Service Number . Before generating the payroll report for Form 941 there are certain guidelines and key-points that are must be kept in mind as denoted below: Form 941 is basically a quarterly form for which the past date for filing is the last day of the last month of 25 % since last filing of this form. There are particular types of information which are to keep stagnant within the form and never change: Filing Time for the proper execution: if you want to specify different filing period through the one already specified, it is recommended to come up with a fresh form in the place of making alterations in the present payroll form. This is accomplished once the changes built in the existing Form 941 will not comply the changes in the areas. Final Totals: Directly changing the full total in the form just isn't advised whilst the total is reached because of the software automatically by calculating the digits of other fields beneath the form. In order to change the total you ought to make change in other fields. Also full details need also be included on Annual Report QB Payroll . Just how to Create Prepare Federal Form 941 In QuickBooks Payroll So that you can generate the QuickBooks Payroll Report 941 follow the steps listed below: Under QuickBooks Desktop, select Employees tab option and then click on Payroll Forms & W-2s accompanied by Process Payroll Forms. Under the File Forms section, click on a particular form to process, and then on ‘File Form’ option. Click on the drop-down arrow and then select on either ‘Year’ or ‘Quarter and Quarter Ending’ dates. Now click on OK. Complete the proper execution and then click on Next tab to proceed with your form. Review all the details provided on your own form to make certain it really is authentic and complete. If you want to enter information in a field this is certainly currently blank, enter it directly in the field. The brand new information is displayed in blue. If you need to edit information this is certainly incorrect: To read more concerning the form, click on View factual statements about this form. Now select the option search for Errors to identify and fix any form errors. Lastly Click on Save and Close tab to save lots of your changes and rectify them later. It is possible to read the filing and printing instructions at the bottom then click on Print tab for the purpose of records to print the proper execution. Go through the option called Submit Form to automatically file your form. Note: should you be employing Enhanced Payroll subscription you will end up expected to save the shape within the PDF form by selecting the PDF option located right in the bottom of the screen. To print the same PDF form payroll report you will be necessary to open the shape and then find the PDF form option through the toolbar under File section. Now find the option called print from the list. QuickBooks Payroll 941 Report The details illustrated below helps to create and print payroll report of form 941. Form 941 is actually utilized by employers to authenticate information about the withheld tax through the paycheck of this employees related to their income, medicare and social security taxes along with percentage of social security and medicare tax paid because of the employer QuickBooks 941 Feature The steps to build and print the Form 941 are same for other payroll forms like Employer’s Quarterly Federal Tax Return, Schedule B, Form 940, FUTA (Employer’s Annual Federal Unemployment Tax Return) and Employer’s Record of Federal Tax Liability. In many cases user face FUTA report error during submitting 940 . It really is expected that with these steps it will be possible to prepare and generate payroll reports for Forms 940 and 941 along with Schedule B of Form 941 if needed. Furthermore, the assumption is you are employing a dynamic subscription of QuickBooks Desktop Enhanced and Standard Payroll as well. QuickBooks Payroll Efile 941 For E-Filling 941 form via QB payroll user need to follow a specific process. First user has to obtain registered for IRS e-file program with their Employer Identification Number (EIN), name, job title, email address, and contact number and electronic signature Check official e-File Options | Internal Revenue Service – IRS. give full details. In QuickBooks user have to navigate through Employees > Payroll Center & need to find a listing of all Federal form and then have to choose Filing Method E-file and then click finish. Now user can Efile 941 via QuickBooks for more help, you must connect QuickBooks Payroll Customer Service Number . Before generating the payroll report for Form 941 there are certain guidelines and key-points that are must be kept in mind as denoted below: Form 941 is basically a quarterly form for which the past date for filing is the last day of the last month of 25 % since last filing of this form. There are particular types of information which are to keep stagnant within the form and never change: Filing Time for the proper execution: if you want to specify different filing period through the one already specified, it is recommended to come up with a fresh form in the place of making alterations in the present payroll form. This is accomplished once the changes built in the existing Form 941 will not comply the changes in the areas. Final Totals: Directly changing the full total in the form just isn't advised whilst the total is reached because of the software automatically by calculating the digits of other fields beneath the form. In order to change the total you ought to make change in other fields. Also full details need also be included on Annual Report QB Payroll . Just how to Create Prepare Federal Form 941 In QuickBooks Payroll So that you can generate the QuickBooks Payroll Report 941 follow the steps listed below: Under QuickBooks Desktop, select Employees tab option and then click on Payroll Forms & W-2s accompanied by Process Payroll Forms. Under the File Forms section, click on a particular form to process, and then on ‘File Form’ option. Click on the drop-down arrow and then select on either ‘Year’ or ‘Quarter and Quarter Ending’ dates. Now click on OK. Complete the proper execution and then click on Next tab to proceed with your form. Review all the details provided on your own form to make certain it really is authentic and complete. If you want to enter information in a field this is certainly currently blank, enter it directly in the field. The brand new information is displayed in blue. If you need to edit information this is certainly incorrect: To read more concerning the form, click on View factual statements about this form. Now select the option search for Errors to identify and fix any form errors. Lastly Click on Save and Close tab to save lots of your changes and rectify them later. It is possible to read the filing and printing instructions at the bottom then click on Print tab for the purpose of records to print the proper execution. Go through the option called Submit Form to automatically file your form. Note: should you be employing Enhanced Payroll subscription you will end up expected to save the shape within the PDF form by selecting the PDF option located right in the bottom of the screen. To print the same PDF form payroll report you will be necessary to open the shape and then find the PDF form option through the toolbar under File section. Now find the option called print from the list. If you want instant support for QuickBooks Payroll 941 Report then you can get in touch with our technical team. Get Help Support For 941 Error , Print or Incorrect 941 Form The steps in the list above should help user to create and print Payroll Report 941 Form without much hassle. However if the user faces any issue it is recommended to get in touch with QuickBooks Payroll Support Number team set up by Intuit ensuring most of the aggrieved customers get their issue resolved within limited time period. Just in case the user has many issue in connecting because of the Payroll team, they are able to go alternative support agencies through their toll free number and garner swift support from in-house support team. Get Help Support For 941 Error , Print or Incorrect 941 Form The steps in the list above should help user to create and print Payroll Report 941 Form without much hassle. However if the user faces any issue it is recommended to get in touch with QuickBooks Payroll Support Number team set up by Intuit ensuring most of the aggrieved customers get their issue resolved within limited time period. Just in case the user has many issue in connecting because of the Payroll team, they are able to go alternative support agencies through their toll free number and garner swift support from in-house support team. 12/15/2020 0 Comments Advanced Pricing In QuickBooks Desktop Advanced Pricing In QuickBooks Desktop QuickBooks Enterprise Advanced Pricing Feature: All You Need to Know Smart business owners and executives discover how crucial just the right pricing is actually for their organization. Effective pricing defines the value of your products and services and shapes the company’s overall profitability. In fact, based on a research by McKinsey published in the Harvard Business Review, just a 1% improvement in price increases operating profits by 11.1%. That’s one reason why companies benefit from personalized pricing with their customers. With personalized pricing, you think about your client’s needs and behaviors and offer a price you think is going to make the sale and mutually benefit your client and your company. The thing is that customizing prices for every client, product, service, or transaction is time-consuming. Your sales team has to keep an eye on complex pricing rules and exceptions and manually enter discounts into each and every sales form. Fortunately, users of QuickBooks Enterprise Solution can depend on Advanced Pricing In QuickBooks Desktop faster and easier than previously. What is Advanced Pricing? Advanced Pricing is a subscription-based feature available to QuickBooks Enterprise Platinum and Diamond subscribers. Advanced Pricing allows organizations to generate pricing rules. When those rules are met, QuickBooks Enterprise automatically adjusts the costs of items on sales forms. If you’re familiar with QuickBooks Enterprise, you may ask, “Doesn’t QuickBooks Enterprise already allow custom price levels?” Yes. But Advanced Pricing goes beyond simply offering discounts for preferred customers. Price Levels vs. Price Rules Price levels have now been for sale in QuickBooks Enterprise for quite some time. They allow users to improve costs for certain customers, or categories of customers, automatically. For example, if you’ve decided to offer a specific customer a 10% discount on all orders, you need to use price levels to take 10% off the standard item price when you invoice that customer. Price rules allow you to get really detailed along with your custom pricing by allowing you to set precise conditions for when QuickBooks changes an item price. For instance, if you need your top ten customers (first condition) to get a 10% discount, but only once they buy 30 or maybe more (second condition) of a certain product (third condition), you can easily set up a pricing rule containing these three conditions. You can create multiple rules with conditions centered on customer, class, date range, item, quantity, and sales rep. How to Enable Advanced Pricing To make the most of price rules, you'll want to make sure you’ve enabled Advanced Pricing in your QuickBooks Enterprise Platinum or Diamond subscription. First, make sure you’re using QuickBooks Desktop Enterprise version 18.0 or later – Advanced Pricing is not available for earlier versions. Next: From the Edit menu, select Preferences. Click on Sales & Customers in the list in the left, then click the Company Preferences When you look at the Custom Pricing section, click on Enable Advanced Pricing. If you choose, you can tell QuickBooks how to handle price rounding at this time. For instance, it's possible to have QuickBooks round pricing to the nearest 10 cents to truly have the system change an order of $525.07 to $525.10. You can use exactly the same rounding for several price rules by selecting Use the same rounding across all price rules, then choosing a rounding option from the drop-down menu. In the event that you would rather set the rounding for each price rule separately, click Set rounding for each price rule. You’ll then need to select the rounding every time you create an innovative new price rule. Click OK to save your selections. QuickBooks will alert you so it has to close all open windows to change this preference. Just how to Create a Price Rule Now that you’ve enabled Advanced Pricing, it’s time for you to create your first price rule. Click the Lists menu at the top of your window and choose Price Rule List. Click the Price Rule button and choose How to Create a Price Rule On the go for the Price Rule Name, enter a name for the price rule. You can even enter a description of the rule if you need. Once you’ve created the rule, it is time for you to create conditions for the rule. Click the + button in the conditions field to incorporate an ailment. In the first drop-down arrow, select whether very first condition applies to an Item, Customer, Class, or sales person. Within the second drop-down arrow, select your next condition. Your available options depend on the sort of condition you’re creating. Complete the other drop-down fields to complete your problem and add additional requirements as needed. You may also set a night out together range to have the rule submit an application for a certain period, such as a seasonal promotion. Into the From field, enter the date that the purchase price rule gets into effect. You'll be able to go into the date for the purchase price rule to expire in the To field in the event that promotion is seasonal, or leave this field blank if the promotion lasts indefinitely. Within the Price field, enter a portion or amount to adjust the standard price of this product or service. Finish setting the purchase price by selecting the appropriate options into the drop-down menus. You can also set any appropriate special options here. You possibly can make an amount rule exclusive by checking the Exclusive Rule Checking this box means that QuickBooks won’t combine this rule with some other rules, thus giving customers a more substantial discount than intended. You may set custom charges for certain items by selecting the Price Overrides Click OK to finalize your selections. Edit Price Rule Once you’ve created your rules, you will see all the rules you’ve manufactured in the cost Rule List. You have access to this list from the Lists menu. From the range of price rules, you may want to delete a rule or make certain rules inactive in the event that you don’t want your sales team to help you to use them for some time but might wish to reactivate the rule as time goes on. How exactly to Create a Quantity Discount in Advanced Pricing Another useful feature of Advanced Pricing is that it allows you to offer quantity discounts to all customers or select customers. For instance, you can give customers a lesser price when buying significantly more than ten or maybe more than 30 items. Establishing quantity discounts can really help entice customers to order in bulk. To produce a quantity discount: From the Lists menu, select Item List. Create an innovative new item or double-click on a current item for which you wish to offer a quantity discount. Click on the Qty Discount Quantity Discount In the Quantity Discount window, go into the minimum wide range of items a client must purchase in order to receive the discount in the Qty From For example, if you intend to offer a discount for customers that order ten or more of a certain item, enter 10 in that field. In the Discount % column, go into the discount you wish to offer. It is possible to enter this as either a share or a set dollar amount. For instance, if you’re likely to provide a 5% discount, enter 5 in this field. Percent Discount You can repeat this process as much times as required to offer additional quantity discounts because of this item. For instance, you can offer a 5% discount for ten or even more items, a 10% discount for 20 or more items, and a 15% discount for 30 or even more items. Select OK to finalize your selections. A couple of things to keep in mind about using price rules within QuickBooks Enterprise: First, in the event that you’ve used price levels in past times, enabling price rules will convert your entire price levels into price rules. Also, for those who have billing rates and price rules that connect with the exact same item, QuickBooks Enterprise applies the billing rate rather as compared to price rule. Finally, QuickBooks Enterprise uses the total quantity at risk item to put on quantity discount rules. Therefore if a product appears on more than one line of a sales form, the software will likely not combine the two lines thereby applying the cost rule. Final Word With QuickBooks Enterprise and Advanced Pricing, your company can have a lot more flexibility in your pricing without plenty of extra work. It might take some time to set up your pricing rules, but once you do, the sales team should be able to provide discounts and promotions that entice customers to buy, without negatively impacting the conclusion. You merely set the price rules, and Advanced Pricing handles the calculations. If QuickBooks Enterprise with Advanced Pricing would benefit your business, get in touch with certainly one of our Solutions Consultants for genuine QuickBooks Enterprise licenses and hosting. 12/15/2020 0 Comments QuickBooks Payroll 1099 Simple tips to create QuickBooks Payroll 1099 Forms From QuickBooks If you have independent contractors for your requirements, you need to complete an IRS QuickBooks Payroll 1099 form for each one that states the specific level of money you paid for services rendered through the tax year. QuickBooks can track money paid to an independent contractor and automatically populate a printable QuickBooks Payroll 1099 form together with his relevant financial data. To solve QuickBooks Payroll 1099 then Contact our Proadvisors. Enable QuickBooks Payroll 1099 Option 1 Launch QuickBooks, then click "Edit" through the menu bar. 2 Select "Preferences" from the drop-down menu, then select "Tax:QuickBooks Payroll 1099" from the left side of the window. 3 Click on the "Company Preferences" tab, then select "Yes" within the "can you really file QuickBooks Payroll 1099 MISC Forms" section. Click "OK." Put Up Vendor 1 Click "Vendors" through the menu bar. 2 Select "Vendor Center" through the drop-down menu. Right-click from the independent contractor for that you desire to create a QuickBooks Payroll 1099 form. Click "Edit." 3 Click on the "Address Info" tab and review the contractor's information to ensure that it is accurate. Go through the "Additional Info" tab. 4 Click on the "Vendor qualified to receive QuickBooks Payroll 1099" box. Type the contractor's tax ID number in the "Tax ID" box. 5 Click the "OK" button. Print QuickBooks Payroll 1099 1 Insert the blank QuickBooks Payroll 1099 form into the printer, then click "File" through the QuickBooks main menu bar. 2 Select "Print Forms" through the drop-down menu, then select "QuickBooks Payroll 1099s/1096" from the list. 3 Discover the contractor for the you do you want to generate a QuickBooks Payroll 1099, then click "Print QuickBooks Payroll 1099." A preview of the QuickBooks Payroll 1099 automatically opens. To check out the detailed data from the form, deselect the "Alignment" box and choose "PDF." 4 Click "Open PDF in Preview" to look at the information and knowledge into the form. 5 Click "Print" to print the completed QuickBooks Payroll 1099 form.  QuickBooks (QB) is just about the go-to accounting software for small and medium businesses all over the world. This is primarily because of the diverse options that the shoppers have by means of QB desktop editions – Pro, Premier, Enterprise, and Accountant. They are all desktop software solutions that have to be installed in your computers. They vary in features along with pricing to cater to every scale and variety of Choose QuickBooks To Manage Your Business and so the customers can choose the best solution with their business. As an example, while QuickBooks Pro can cater up to 3 users, QuickBooks Premier offers 5 users. The Premier edition has most of the QB Pro features with a few additional ones. However, these versions would be best designed for small enterprises with a small workforce. For a growing business, however, the greatest version that QuickBooks offers is QuickBooks Desktop Enterprise. QuickBooks Enterprise Solution is an all-in-one package for businesses planning to expand their operations in the future. Here are a few associated with explanations why growing businesses should buy QuickBooks Enterprise.1. It may grow with all the business For an organization which includes a target to ascertain itself in the market when you look at the coming years must certanly be proactive with its approach. Hence, you really need to seek out solutions that will grow using the business. Otherwise, as time passes, you would have to keep migrating to different business management software solutions. QuickBooks Enterprise Desktop is considered the most scalable solution offered by Intuit. The sooner QB Enterprise versions offered at the most 30 users. However, Intuit has increased how many users to 40 in the latest QuickBooks Enterprise Platinum 20.0 Diamond package. However, the biggest thing to note listed here is as you are able to buy 1-10 user license when the company is in the early stages and will upgrade later as it grows, and you also require more users. Hence, you always just pay when it comes to users you may need. 2. No need for an ERP ERP or Enterprise Resource Planning is a business management solution comprising of the many core business functions like sales, HR, finances, customer management, etc. However, the ERP solution is cost-effective just for multinationals with a considerable workforce. A small/mid-sized business cannot leverage all of the features of an ERP solution. Also, the prices among these ERP solutions are generally on the high side, not affordable by an evergrowing business. QuickBooks Enterprise has all of the essential accounting features like invoicing, payroll, payments, and receipts that an evergrowing company needs. Along with the accounting functions, you also get some advanced functions like inventory, reporting, and sales, so that you get a complete business solution. Hence, you get all you need in QuickBooks Enterprise and save the expense of deploying a separate ERP solution. 3. Integrate useful applications While the business keeps growing, the business required additional functions, along with this supplied by QuickBooks Desktop Enterprise. These functions may be anything from employee time tracking to an easy data import/export tool. Various applications can be obtained to perform these complementary functions. However, it is vital that the applications integrate with your QuickBooks Enterprise, so that the dataflow gets automated. QuickBooks Enterprise offers integration with more than 200 third-party applications covering diverse functions. Hence, you certainly do not need to check any place else once you choose to go for QuickBooks Enterprise. 4. Get unlimited support Whether you have a dedicated IT team in your workplace or perhaps not, there are a few issues that can only just be resolved by experts. Intuit offers exclusive customer care, which suggests that you can contact their team of QuickBooks experts for assistance with installation and setup of QB Desktop Enterprise. Moreover, you can even contact them in the event of any queries. However, if you choose for QuickBooks Enterprise Hosting service from an Intuit Authorized Commercial Host, you receive round-the-clock support regarding all your IT issues. This, along with QuickBooks support, means that it is possible to work worry-free with expert help at your beck and call. 5. Solutions specific to your industry Perhaps one of the most important considerations for an evergrowing company would be to identify the important thing features they need in operation software due to their type of industry. Otherwise, they wind up paying a lot more than they use or don't get enough features to achieve their tasks. With QuickBooks Enterprise, all your valuable worries of having just the right features vanish because it offers business-specific approaches to industries like construction, nonprofit, retail, professional services, accountants, wholesale and manufacturing, amongst others. Construction: If you are a contractor, QuickBooks Enterprise supplies the best solution for you personally. It will help you manage your projects efficiently by estimating job costs accurately. Moreover, you also create work orders, get customized report bundles, schedule tasks, and set reminders. Manufacturing and Wholesale: QB Enterprise for manufacturing and wholesale enables you to manage your inventory by tracking items by serial number, lot number, or bin location. You can get a dedicated dashboard to control the sales orders and look inventory levels in real-time. Retail: With QB Enterprise solution for retailers, you will get key insights into your retail business with reports like monthly sales by customer and purchase volume by vendor. You'll be able to automate the pricing by setting rules for items, such as for example quantity discounts and scheduled promotions. Other features include sales summary form and sales graph. Nonprofit Organization: if you should be a part of a nonprofit setup, QuickBooks Enterprise helps you store the donor list securely by setting roles and access permissions for users. In addition get built-in templates to customize donor forms aided by the designed logo and statement. Professional Services: QuickBooks Enterprise offers a customized solution for service-based businesses. Its advanced functions aid in monitoring the cashflow with the help of projections. You are able to create job costing estimates by comparing the expense of multiple projects, track progress and profitability levels, and more. Accountants: The QuickBooks Enterprise Accountant Edition offers specialized services for the accounting professionals to allow them to serve their customers effortlessly. Features like QuickBooks File Manager and Accountant Center helps in better management and sharing of files with clients and simple reconciliation, respectively. Final Note An organization needs most of the right tools and resources to keep up with all the competitors and make certain constant growth.QuickBooks Desktop Enterprise is not just a fundamental accounting tool but in addition provides some essential business functions that eradicate the cost and efforts of implementing an ERP solution. If you are a little and medium business, QuickBooks Enterprise could be the optimum solution for you personally. To learn more about QuickBooks Desktop Enterprise, call our Solutions Consultant. 12/14/2020 0 Comments QuickBooks Payroll 943 QuickBooks Payroll 943 Form 943 Detail QuickBooks Payroll Organizations who utilize agricultural or rural laborers should report the Social Security as well as Medicare charges and government income tax charges withheld on the QuickBooks Payroll 943 form, Annual Tax Return of Organizations for Agricultural Workers. In the off chance that the liability associated with tax is kept semiweekly, during the point QuickBooks Payroll 943 filer will become necessary in order to list the total amount of liability on QuickBooks Payroll Form 943-A. QuickBooks incorporates the Excel sheet which comprises of worksheets intended to gather and arrange data and information required within the QuickBooks Payroll 943 Form. The QuickBooks Payroll 943 worksheet demonstrates sums for assessable wages together with amount of tax for government income tax withholding, Medicare, and Social Security. It likewise demonstrates the aggregate for advanced gained income. It is possible to outline the 943 information to the Excel and utilize the data to file the QuickBooks Payroll 943 with IRS. Increased detail of available about Taxes and Forms (USA) QuickBooks on world leader payroll software help provider. 943 Form Option In QuickBooks Clients who have the Standard or either Enhanced Payroll membership can prepare along with file the Payroll 943 Form into the QuickBooks. You should file QuickBooks Payroll 943 Form – A: The Federal Tax Liability Annual Record and file it with QuickBooks Payroll 943 Form in case you may be a semiweekly investor or perhaps in case your liability regarding the tax on some of the day amid the timetable year is $100,000 or above. QuickBooks Payroll Form 943-A rundowns the liability of this tax accumulated on each and every day for the logbook year. The aggregate liability for the tax should match the Line 11 regarding the QuickBooks Payroll Form 943. User will get in contact with QuickBooks Payroll Support Number in case they need help & details about any payroll tax forms like W2, W3, 940, 943, 1099, 945 etc. Simple Tips To Create 943 Form In Intuit QB Payroll Create the Payroll 943 Form in to the QuickBooks Desktop So that you can create the QuickBooks Payroll Form 943: Important: In case the form is not accessible while you open the chosen Payroll Form screen, during the point, you must update the payroll tax tables. Select Employees option >> then click from the Payroll Tax Forms & W-2s button > after that click on the Process Payroll Forms option. Choose Annual Form 943-943A – Organization’s Annual Federal or government Tax Return for the Agricultural workers. Go through the File Form button. Click and alter the season in to the option ‘Select Filing Period section, just in case required, and then go through the OK button. Ensure the details on every interview page, and then click on the Next button before you see Save and Close or either Save as a PDF file. Important: Prior to saving the document, it is strongly recommended that you towards the print a duplicate copy of the form. Important: Now, you unable to utilize E-File or either E-Pay in an effort to process your Form 943. E-File 943 Form QuickBooks E-filing the QuickBooks Payroll 943 form is completely secure along with accurate. Although you e-file, during the point the framework sends an affirmation that the IRS can get the return within 24 hours. Electronically filing the returns includes utilizing an unofficial who can transmit the returns for only a little charge. Investigate your choices mentioned below. Option 1 Contact to an Authorized or certified IRS e-file supplier or Provider so that you can sign, prepare and e-file your return effectively. Option 2 Buy the IRS-approved application accessible via a certified and certified IRS Online Filing supplier or Provider. Utilize the program in order to send the return to an appropriate and approved provider who is experienced in e-files the 94x returns easily. You can find the 3 signature alternatives for you. Several suppliers or providers don’t provide every signature options. Select a provider who offers the signature option as you require. Online Signature PIN Complete the Online 94x PIN Registration procedure that is available in the program to end up an approved data of your organization’s 94x returns. Utilize your 10-digit PIN in order to sign up these tax statements. It could take up to 45 days to get your PIN. Get Help for 943 Form Tax Liability Payments Intuit Payroll Although above information will guide the user to learn all about 943 form via QuickBooks, however in case user need help they could reach at us via QuickBooks Support contact number which works most of the day. If you need extra information or you are facing trouble to make use of the QuickBooks Payroll 943 Form, call our 24*7 toll free QuickBooks helpdesk number. Have the best resolution instantly. 12/13/2020 0 Comments Bank Feeds Import Errors In QuickBooks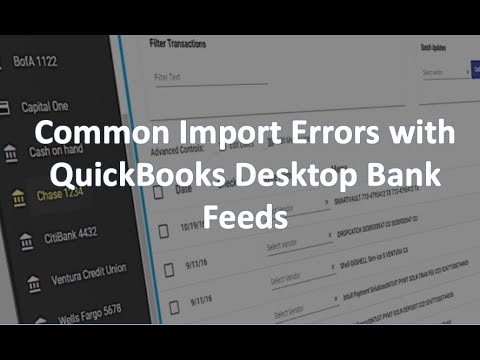 Bank Feeds Import Errors In QuickBooks Do you receive OL and OLSU Bank Feed Errors? Don’t worry, this web site post is intended to go over the troubleshooting steps to correct these common QuickBooks online banking and connection errors. These errors include OL-202, OL-206, OL-221, OL-231, OL-249, OL-334, OL-203, OL-393, OLSU-1011, OLSU-1016, and OLSU-1014. However, if you are not a tech savvy and need a quick guidance to eliminate this error Bank Feeds Import Errors In QuickBooks you can easily connect to QuickBooks online support team. Do you know the reasons for OL and OLSU Bank Feed Errors QuickBooks online banking errors may occurs due to the following reasons: A concern or dispute together with your bank (also known as standard bank). Your bank could have changed their services, Web Connect or Direct Connect. Your bank was associated with a merger and alter of name, and therefore has to be refreshed in QuickBooks. You could own an energetic account with your bank, and that's enabled for Online Banking in QB. Your bank’s server might be temporarily down. There can be a problem together with your net connection. There might be an issue with more than one accounts in your QuickBooks company file. The download or import pattern may have a concern. A discontinued, older form of QuickBooks Desktop or your Windows OS. Before you decide to Relocate To the Troubleshooting Part A lot of the banks and banking institutions need identity confirmation before accessing any data from Personal Finance Management software (PFM). To fulfill the bank requirement, you need to log in to your bank account using a method aside from QuickBooks Desktop and verify your Message Center or inbox to get more details. Banks may also be contacted if required. Look at the Given Terms Before Proceeding Further You're going to have to meet the given criteria and look them. 1. Are you connected to the internet? No: Being connected to your internet is mandatory in an effort to download online banking transactions. Yes: Diagnose and fix the connectivity issue. Check firewall and internet security settings. 2. Have you got a version supported by QB Desktop and web browser? No: Only use supported versions (just click here to know what Versions of QuickBooks are Supported on Windows 10). Yes: Continue. 3. Are you using QuickBooks Desktop application latest release? No: Kindly use the latest release. (Currently latest version is QuickBooks desktop 2019) Yes: Continue. 4. Have you ever downloaded a transaction from your bank to your current QB Desktop company file? No: Communicate with your bank and verify your bank details. Also, ensure that the financial institution doesn't have outages before performing any solution to your issue. Yes: Continue 5. is it possible to log on to your bank account through the bank’s site using QuickBooks Desktop? No: Speak to your bank to verify your details and see if the bank is experiencing any supply issue before you move on to fix your condition. Yes: Review Connlog.txt file (Bank Feeds log files) for the availability of any connection failure messages and communicates them to your bank. 6. Check Classic (Register) view and see if you learn the exact same results? (For users in the USA) Classic mode is considerably more lenient concerning the OFX formatting standards required by banks to use for statement download or import. It is possible to, for testing purpose, change to Classic (Register) mode and try to import or download again. Go to the Edit menu and choose Preferences. Choose Checking from the left menu and tap from the Company Preferences tab. Now, go to the Bank Feeds section and choose the Classic (Register) Mode radio button. Click OK. Simple tips to Fix OL and OLSU Error in QuickBooks Desktop? Here are the quick hacks to eliminate OL and OLSU errors in QuickBooks desktop while downloading or importing transactions. Please perform these steps in the order as previously mentioned and attempt your download after each step: Step 1: Enable TLS 1.2 Security Protocol, If available The given steps can assist you in enabling TLS 1.2 in the latest version of web browser. Open IE 11 (make certain you have the latest IE version installed). Tap once from the gear icon on the web Explorer. Head to Internet Options and choose Advanced Tab. Scroll down to find Security section. Uncheck the USE TLS 1.0 box and look in USE TLS 1.2. Click Apply. Click OK button. Close all open programs and restart your personal computer for changes to happen. If the same error message exists, continue steadily to the next step. Step two: Make a fresh company sample file This task will help one to identify any issue that starts along with your bank their servers. To begin with go directly to the QuickBooks File menu, and then choose New Company, and then Express Start. After that add a banking account (the one in which you were facing issues) in the created test company. Now, setup account fully for bank feeds. Test the account by performing bank feed transaction downloads. In the event that issue persists, proceed to step three. Step 3: Run account setup using the Ctrl key suppressed This task can bypass previously failed connections and will allow you to do away with partial, incomplete or unsuccessful connections together with your bank. You can access information on step by step description by using QuickBooks experts or by going to the official website of Intuit. Once you perform this step and also the issue disappears, it can translate to your successful troubleshoot of QB Desktop online banking and connection error, and you will be able to download transaction. Move on to the next phase in the event that issue still exists. Step 4: Create a brand new account and merge accounts In several cases, there might be hassles/problems connected with setting within the account or downloading the financial transactions too. These steps assist you to conclude if the issue occurs because of that account. Prior you implement the following procedure, you really need to clear most of the pending financial transactions/reports. This might entails matching any formerly downloaded financial transactions/reports which have not been matched. Navigate towards the “Chart of Accounts” option; perform right-click regarding the account from the issue. Choose the “Edit Account” tab. Emphasize the “Account Name” icon, and then hit onto the “Copy” tab. Within the account name enter an asterisk (*) mark at the conclusion. When you look at the “Bank Feed Settings” option, and then find the “Deactivate All Online Servicesradio” tab. Pick the “Save” icon & then the “Close” icon. When you look at the “Chart of Accounts” section, create or build a new account. Copy & paste the Account name without having the asterisk (*). Close & reopen the QuickBooks company file. Into the “Chart of Accounts” tab, perform the right-click from the ‘account’ with the asterisk (*) mark, and then select the “Edit Account” tab. Eradicate the asterisk (*) mark & then, choose the “Save” icon& later “Close” icon. When the warning message appear in the dialogue box. It will probably prompt you to definitely choose the “Yes” icon. Set up/create an account for the ‘Bank Feeds’ purpose. Download financial transactions through the new merged account. In case, you will do ‘NOT’ receive any QB error message: This means that you have got resolved the technical hassle/error associated with the account. Your financial transactions have already been downloaded & it is possible to discontinue the fixation process. In the event, you encounter exactly the same error warning message: This shows that the technical glitch failed to initiate or connected with this account. If you will find multiple account put up for online banking then, continue with the Step 5. Step 5: Deactivate all accounts with online services. If you own one or more account set up for online banking services, these steps will allow you to identify the origin accounts in your organization file. Sometimes, when you have only 1 account with a mistake that keeps it from connecting towards the bank, this could not allow your online accounts to exert effort. Note: This process may be time intensive if you have multiple accounts put up for online banking. Firstly, pick the Include inactive checkbox at the end associated with the Chart of Accounts window. For several inactive accounts, deactivate Bank Feeds and close and reopen the file. From then on Set-up every account fully for Bank Feeds. Contact QuickBooks technical support (users in america and Canada), if you're unable to deactivate Bank Feed settings for your accounts. It could happen as a result of corrupt or damaged data. Move to step 6 if the above solution didn’t fix the error. Step 6: make contact with your bank QuickBooks users receive assistance in recovering errors from their end from all banks and financial institutions that support QB online banking. Check out basic things you should know: Before contacting your bank to look for any assistance, you should collect all of the log files of bank feeds. QuickBooks performs online banking, and thus, almost all of the OL and OLSU series online banking and connection errors ought to be fixed through finance institutions. If the error still remains unsolved, you ought to ask bank executive to get hold of and transfer the concern to online connectivity band of Intuit. This website post is made to offer you most of the possible approaches to get rid of from OL and OLSU errors. However, if you want any assistance about the same error or just about any other QuickBooks related issue, you can always contact our QuickBooks payroll support team anytime by dialing . Our availability is round the clock. 12/13/2020 0 Comments QuickBooks Error Code 6069 Just how to Troubleshoot the QuickBooks Error Code 6069? All of that you should know about QuickBooks error code 6069 QuickBooks is inarguable one of the better accounting and bookkeeping software in the market. This application happens to be specially created for small and medium businesses. In reality, the application has powerful features that assist the organizations in managing their finances effectively. Even after offering many perks to users and in addition being a user-friendly software this application is at risk of technical errors plus one such issue is QuickBooks error code 6069. In this website post we have explained what is QuickBooks Error 6069 – What are it’s causes, signs & symptoms and just how a user can resolve this QuickBooks Error Code 6069 manually. If you would like resolve QuickBooks Error Codes instantly you'll be able to take assistance from experts. What Causes the QuickBooks Error 6069? Usually the QuickBooks error 6069 occurs when users try to make an invoice in a particular account as soon as attempting to save it the QuickBooks program shuts down. This leads to loss in data thereby causing more trouble for the users. Below are a few of the possible causes behind to this error: QuickBooks software not downloaded completely. Damaged or corrupted download of QuickBooks software. Damaged windows registry that is affecting the software. Virus or malware adversely affecting QuickBooks application or any one of its related file. Interference of third party applications aided by the QuickBooks software. Signs and symptoms of QuickBooks Error 6069 You certainly will receive a message on the screen and your active program will crash. The computer will slow down and frequently hang. The computer will freeze Simple tips to troubleshoot the QuickBooks error code 6069? Error code 6069 can certainly be fixed through the below mentioned solutions: Solution 1: The first thing to do is log in to the machine since the ‘Administrator‘. From then on click to open the Intuit Sync Manager. Now go directly to the ‘Options‘ and then choose ‘Show Details‘. After this choose the ‘Name associated with company‘ as well as the right click upon it. Once done pick the ‘Company Info‘ option. Now check out the path which is mentioned once the location is right. Once done, open the company folder again to alter the present company file utilizing the original one. Following this give an attempt to sync the files again. Solution 2: Click on ‘Start‘ after which open ‘All Programs‘ After this select ‘QuickBooks‘ as well as QuickBooks Database server manager. Now go through the ‘Scan folders‘ tab If no folders are present click on ‘Add Folder‘ and if yes then highlight the folder combined with files and then hit in the ‘Scan‘ tab. In the bottom box using the heading ‘QuickBooks Company file found’ and it's also the organization file in question which has to be confirmed. Again you will need to open the file. Try opening QuickBooks again and try to sign-in to the organization file. See Also: Simple tips to Fix Intuit QuickBooks Error code 31? Solution 3: To start with click on the ‘Start‘ button. From then on, You need to Enter “command” into the search box but don’t hit on ‘Enter‘ key Now on your own keyword While holding ‘CTRL + Shift‘ you'll want to press ‘Enter‘ key. You're going to be prompted a permission dialog box. You will need to click on ‘Yes‘ there. With a blinking cursor, A black box will open enter “cleanmgr” and press ‘Enter‘ key. Now the Disk Cleanup will start calculating exactly how much occupied disk space you can reclaim. With number of checkboxes, The Disk Cleanup dialog box will show up you can select. More often than not, the “Temporary Files” category will occupy the most disk space. You want to clean, check out the boxes of this categories and then click on ‘OK‘. I really hope you are able to fix the QuickBooks error 6069 from your own QuickBooks software, if still the matter persists you then need to use the help of QuickBooks error support providers. You can easily reach us by our toll free number. However, if you want further assistance regarding this, don’t hesitate in order to connect with this experts through mail or our chat service.  Simple tips to Transfer Quickbooks From an Old Computer to a New One After installing exactly the same or newer version of Quickbooks on your new computer you can easily transfer a backup of your old computer's QuickBooks file. Once the back-up process has completed, you can always maintain an eye on rent, schedule payments to vendors and keep record of all your company expenses and income. If you want to learn about How To Move QuickBooks Company File To Another System and you need any help then call our experts. Additionally, if you'ren't already creating regular backups of one's QuickBooks files, you should do this each time you update your account files to make certain that you don't lose valuable financial data. Produce the Backup File 1 Connect a portable storage device such as for instance a USB or external disk drive to your old computer. 2 Launch QuickBooks on your old computer and open the company file you want to transfer. 3 Click on the "File" menu and then select "Create Backup." 4 Select "Local Backup" and click "Options." Locate your own personal storage device and choose it since the location for your backup. Click "Next." 5 Select "Save It Now" and "Next." 6 Click "Save" and wait for the backup file to be created. Restore the Backup File 1 Insert your own personal storage device to the new computer and open QuickBooks. When you haven't already installed QuickBooks on the new computer, try this first. 2 Click on the "File" menu and select "Restore Company." 3 Select "Restore a Backup Copy" then click "Next." 4 Select "Local Backup" whilst the location for your backup file. 5 Navigate to your individual storage device and then click from the QuickBooks backup file. Click "Open" and then "Next." 6 Make sure you wish to restore the backup file and choose "Save" to initiate the restore process. To find out more, Dial QuickBooks Support Phone Number. |
AuthorWrite something about yourself. No need to be fancy, just an overview. Archives
November 2020
Categories |
 RSS Feed
